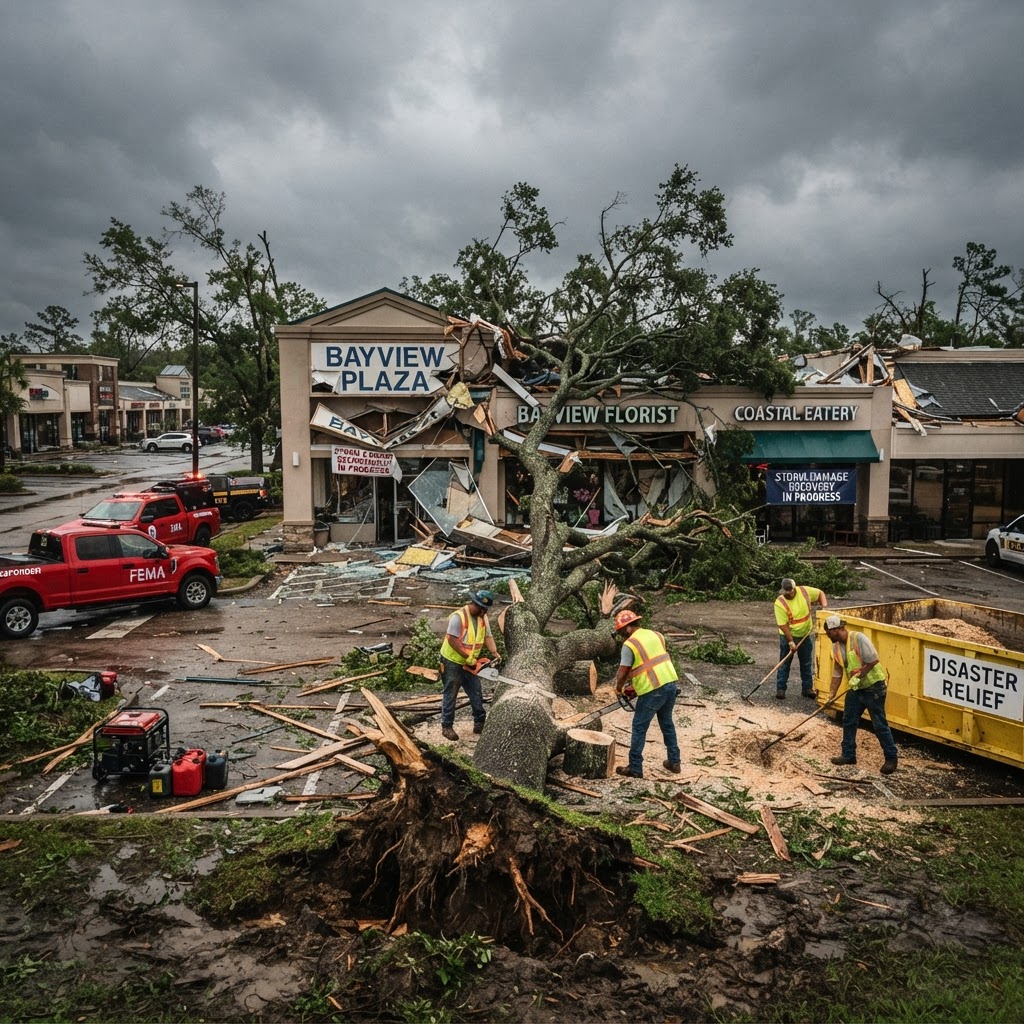
Storm Damage Recovery for Property Managers: A Complete Guide
Severe weather causes billions of dollars in property damage annually. From hurricanes and tornadoes to severe thunderstorms, ice storms, and blizzards, property managers must be prepared for whatever nature throws at their buildings.
This guide covers the complete storm damage recovery process—from preparation before the storm to long-term restoration after.
Storm Types and Their Damage
Wind Damage
Wind Speed Thresholds:
- 40-50 mph: Minor damage (loose items, small branches)
- 50-70 mph: Moderate damage (shingles, siding, signs)
- 70-90 mph: Significant damage (roof damage, tree damage)
- 90+ mph: Severe damage (structural damage, total roof loss)
Common Wind Damage:
- Roof shingle and membrane damage
- Siding and fascia damage
- Downed trees and limbs
- Broken windows from debris
- HVAC unit damage
- Antenna and satellite dish damage
- Fence and gate damage
Water Damage
Sources:
- Heavy rainfall causing flooding
- Storm surge (coastal areas)
- Roof leaks from damaged roofing
- Window and door leaks
- Gutter and downspout overflow
- Groundwater intrusion through foundation
Common Water Damage:
- Interior flooding
- Drywall and ceiling damage
- Flooring damage
- Electrical system damage
- Mold growth (within 24-48 hours)
- Content damage (furniture, equipment, inventory)
Hail Damage
Hail Size and Damage:
- <1 inch: Minimal damage
- 1-1.5 inches: Minor roof and siding damage
- 1.5-2 inches: Moderate damage (dents, cracks)
- 2+ inches: Severe damage (structural damage, broken windows)
Common Hail Damage:
- Roof shingle damage (granule loss, cracks, punctures)
- Siding dents and cracks
- Window and skylight breakage
- HVAC condenser damage
- Vehicle damage
- Outdoor equipment damage
Ice and Snow Damage
Common Damage:
- Ice dam formation on roofs
- Frozen and burst pipes
- Roof collapse from snow load
- Gutter damage from ice
- Tree damage from ice accumulation
- Slip and fall liability
Pre-Storm Preparation
Before Storm Season
Property Inspection Checklist:
- Inspect roof for loose or damaged materials
- Check and clean all gutters and downspouts
- Inspect trees for dead or weakened limbs
- Check exterior cladding and trim
- Inspect windows and doors for proper sealing
- Secure or remove loose items on property
- Check drainage systems for proper flow
- Inspect roof penetrations and flashings
- Verify sump pump operation
- Check backup generator readiness
Documentation:
- Photograph property condition before storm season
- Document existing damage (to distinguish from storm damage)
- Update emergency contact list
- Review insurance policy coverage
- Verify contractor availability for emergency response
- Review and update emergency procedures
When a Storm Is Approaching
24-48 Hours Before:
- Secure loose outdoor items (patio furniture, signs, etc.)
- Check emergency supplies (flashlights, batteries, first aid)
- Verify communication systems are working
- Alert tenants about approaching storm
- Review emergency procedures with staff
- Check that emergency contact list is current
- Fuel up vehicles and equipment
- Charge all communication devices
- Verify generator fuel and operation
- Check sump pumps and remove items from flood-prone areas
During the Storm:
- Monitor weather updates
- Keep staff and tenants safe
- Do not go outside during severe weather
- Document any damage as observed (from safety)
- Be prepared to respond once storm passes
Post-Storm Damage Assessment
Step 1: Safety First
Before inspecting damage:
- Wait for official all-clear from authorities
- Check for downed power lines (stay at least 10 feet away)
- Check for gas leaks (smell for gas, listen for hissing)
- Check for structural damage (cracks, sagging, leaning)
- Wear PPE (boots, gloves, eye protection, mask)
- Use caution around standing water (electrical hazard)
- Watch for wildlife that may have been displaced
Step 2: Exterior Assessment
Document all exterior damage with photos and video:
- Roof damage (shingles, flashing, membrane)
- Siding and exterior wall damage
- Window and door damage
- Gutter and downspout damage
- Tree and landscaping damage
- Parking lot and sidewalk damage
- Fence and gate damage
- HVAC and rooftop equipment damage
- Sign and lighting damage
- Foundation damage (cracks, shifting)
Step 3: Interior Assessment
Document all interior damage:
- Water stains and active leaks
- Ceiling damage
- Wall damage
- Flooring damage
- Electrical system damage
- Plumbing damage
- Mold growth
- Content damage (furniture, equipment, inventory)
- HVAC system damage
- Elevator damage (if applicable)
Step 4: Documentation
For insurance claims and contractor coordination:
- Take extensive photos and video of ALL damage
- Note the date and time of each photo
- Create a written damage inventory
- Keep all receipts for emergency repairs
- Document temporary repairs made
- Save all communication with tenants and contractors
- Keep a log of all activity
Emergency Response and Stabilization
Priority 1: Prevent Further Damage
Immediate Actions:
- Tarp damaged roofs to prevent water intrusion
- Board up broken windows and doors
- Shut off water to burst pipes
- Shut off electricity to flooded areas
- Remove standing water (pumps, wet vac)
- Move undamaged contents away from damaged areas
- Document all emergency repairs (before and after photos)
Emergency Contractors:
- Roofing contractor (emergency tarping)
- Water extraction company
- Board-up service
- Plumber (for burst pipes)
- Electrician (for electrical hazards)
- Tree removal service
- Security company (if building is unsecured)
Priority 2: Protect Occupants
- Ensure safe egress from all areas
- Address any immediate safety hazards
- Communicate with tenants about safety issues
- Provide temporary relocation if units are unsafe
- Post warning signs for hazards
- Secure the property against unauthorized access
Priority 3: Begin Restoration
- Contact insurance company to file claim
- Engage restoration contractors
- Begin water extraction and drying
- Start debris removal
- Begin temporary repairs for habitability
- Schedule permanent repairs
Insurance Claims Process
Filing the Claim
- Contact your insurance company immediately (most require prompt notification)
- Provide initial damage description and extent
- Request an adjuster visit to assess damage
- Document all communication (dates, times, names, claim numbers)
- Keep all receipts for emergency repairs and temporary housing
- Cooperate fully with the insurance adjuster
Working with Adjusters
- Walk through the property with the adjuster
- Point out all damage, even minor items
- Provide your documentation (photos, inventory)
- Get the adjuster's contact information
- Ask for a timeline for claim processing
- Get everything in writing
- Don't accept the first offer if it seems low
Documenting Damage for Claims
Essential Documentation:
- Date and time of storm event
- Weather reports from the event
- Photos of all damage (before any cleanup)
- Video walkthrough of damaged areas
- Itemized list of damaged items with replacement value
- Receipts for emergency repairs
- Contractor estimates for permanent repairs
- Before photos (if available) to show condition prior to storm
Common Insurance Issues
- Underestimation: Adjusters may miss or undervalue damage
- Exclusions: Some policies exclude certain types of water damage
- Depreciation: Actual cash value vs. replacement cost
- Deductibles: Wind/hail deductibles may be percentage-based
- ** timelines**: Claims must be filed within specified periods
Restoration Timeline
Phase 1: Emergency Response (0-72 hours)
- Secure the property (tarps, board-up)
- Begin water extraction
- Start drying process
- Remove safety hazards
- Document all damage
- File insurance claim
Phase 2: Assessment and Planning (1-2 weeks)
- Insurance adjuster visit
- Contractor assessments and estimates
- Develop restoration plan
- Order materials
- Schedule work
Phase 3: Structural Repairs (2-8 weeks)
- Roof repair or replacement
- Structural repairs
- Exterior repairs (siding, windows, doors)
- Plumbing and electrical repairs
- HVAC repair or replacement
Phase 4: Interior Restoration (4-12 weeks)
- Drywall repair and replacement
- Flooring repair or replacement
- Painting
- Cabinetry and fixture replacement
- Content restoration or replacement
- Final cleaning
Phase 5: Final Inspection and Closeout
- Quality inspection of all repairs
- Final insurance inspection
- Tenant walk-through (if applicable)
- Complete documentation package
- Close insurance claim
Tenant Communication During Recovery
Communication Protocol
- Notify tenants immediately of any safety concerns
- Provide regular updates on restoration progress
- Be transparent about timelines
- Address individual tenant concerns
- Document all tenant communications
- Coordinate temporary relocation if needed
Temporary Relocation
If units become uninhabitable:
- Identify temporary housing options
- Coordinate with insurance for additional living expenses
- Provide storage for tenant belongings
- Communicate move-out and move-in timelines
- Prorate rent for displaced period
Long-Term Mitigation
Reducing Future Storm Damage
After recovery, invest in mitigation:
- Upgrade roofing to impact-resistant materials
- Install storm shutters or impact-resistant windows
- Improve drainage systems
- Reinforce roof-to-wall connections
- Upgrade landscaping to reduce water damage
- Install backup generators
- Trim trees regularly to prevent limb damage
- Secure loose items during storm preparation
- Review and update emergency procedures annually
Conclusion
Storm damage recovery is a multi-phase process that requires preparation, rapid response, thorough documentation, and patient restoration. By preparing before storm season, responding quickly after a storm, documenting everything for insurance, and working with qualified contractors, property managers can minimize damage, reduce recovery time, and protect their property investment.
Auxi Services provides storm damage assessment, emergency response, and full restoration services. Contact us for emergency response or pre-storm preparation.